Roger Bisby gets to grips with the latest tiling and waterproofing solutions.
Dunlop’s range of tiling products seems to be on the rise. There are more and more stockists and the price looks to be very competitive. I have to confess that I am more of a powder monkey than a ready mix man, but I was coming and going a lot on this job, so the appeal of a tub of ready-mixed Dunlop RX-3000 Waterproof Wall tile adhesive was too much to resist. It meant I could nip in, do a few tiles and then disappear, without the adhesive going hard in the bucket.
The adhesive is easy to spread thanks to its lightweight formulation and has good grab, so I was more than happy to give it a go. I tend to pull a tile off every so often to check the contact and this proved hard to do with the high grab of this adhesive. I didn’t need to use battens either, because the product has great non-slip properties.
But before we get to the tiling there is the substrate to consider. I have spent the last 30 years trying to persuade the trade to move away from plasterboard in the shower area. I have seen so many disasters, some leading to dry rot and floors having to be replaced, that I am adamant that gypsum has no place in a shower. I was, therefore, heartened to read in a recent article that Knauf, who make tonnes of plasterboard, agrees with me. Its alternative is Aquapanel, which is a product I have used on countless occasions. My objection to it is that it is heavy to move around and dusty to cut, but Knauf has addressed this by reducing the weight and producing a score and snap tool.
So, there is a good alternative – in fact there are lots of better options than plasterboard to use in shower areas. If you are still thinking that moisture resistant plasterboard is OK, or that you can tank the plasterboard with a membrane, then I concede that this is better than nothing but, as Knauf points out, gypsum is organic and it will soften in the presence of moisture vapour.
A product I have been using for many years is the British-made Elements board from Abacus. First of all it is totally waterproof – it is also lightweight and easy to cut – but something less appreciated is that it has an insulated core. This means that the tiles are not drawing cold from the wall and are therefore less prone to condensation. I have two walls in two different shower rooms and they are both on the same flank, so I am able to witness first hand just how much difference it makes. The wall with the dot and dab Elements board has no mould on the grout lines because it is warmer.
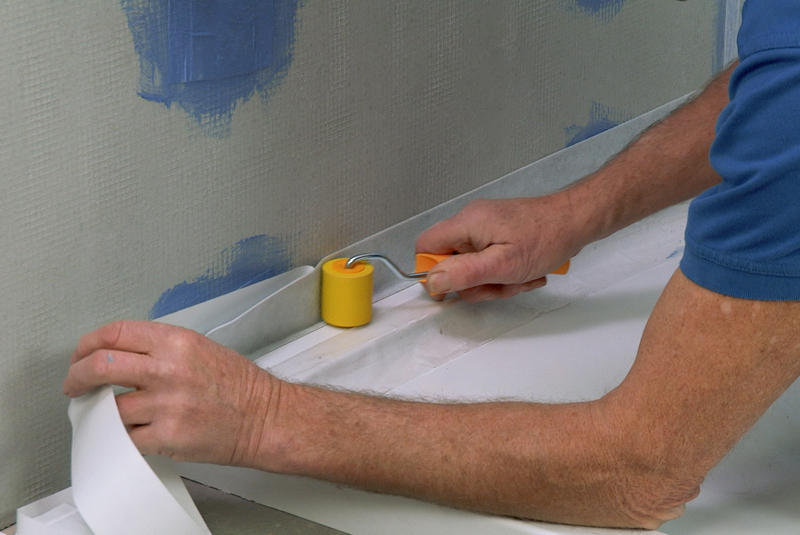
The joints and fixings on the board are covered with Proseal and neoprene tape. This is, of course an extra cost and it is really only the wet area that needs the neoprene tape. Elsewhere in the room I use Proseal and fibreglass scrim. This is my chosen method of tanking a shower and I have never had the slightest problem persuading my customers that this is the way to go. With bathrooms costing anywhere between £5 and £10K, the cost of the tanking is small change, whereas the cost of not doing it can be thousands. So, as harsh as it may seem, if a customer is not prepared to put a little more into the foundation work I am inclined to walk away. I just don’t want the aggro from call-backs.
Adhesive selection
So that is my rant over and done with, but when you have spent time, effort and money on the preparation, you then want to follow it up with a good quality tile adhesive. Despite having tanked the room completely I am still not a fan of ‘water resistant’ tile adhesive. It may be OK in non-wet areas of the bathroom, but if there is water running down the walls you need ‘waterproof’ tile adhesive. If it says it is good for swimming pools and outdoors, then it’s good enough for showers.
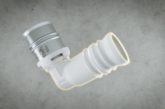
The other thing I always do is to apply a No More Leaks sealant kit around the junction between the tray and the wall. I used to use trays with upstands but having to chase the wall out to accommodate that lip meant that there was often a void where you don’t want one. My approach is to take the board to the floor, prime the floor and apply Proseal, then bed the tray in on this and tape up with the kit. The tape is flexible and self-adhesive, and once it bonds with the board you can’t tear it off.
This approach gives you three layers of waterproofing, and allows for small movements from shrinking timbers. It may seem like overkill, but it works and I happy to guarantee it. Tell a customer that and you have the job!
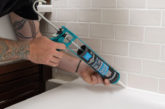
The final two products in the Dunlop line up that I used on this job are the cement-based GX-500 flexible tile grout, which you mix up in a tub or bucket, and their colour-matched FX 90 silicone sealant. I have seen some great looking bathrooms ruined by ugly silicone, so it is important to get this right. I leave a tile spacer between the tray and the bottom tile and gun the silicone into the void. It can then be struck off flush with the tile face. The silicone is the first line of defence and when I have seen it leak it is when it’s applied to the face of the tile and the tray. Put it on the underside of the tile and you have a 10mm thick bead that is very unlikely to pull away. If it does, the tape has it backed up.
In the next part of this project I tackle the floor with an uncoupling membrane and Dunlop Rapid Set Flexible Tile Adhesive.
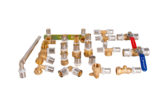
Products featured in this article include: