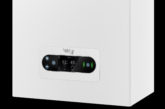
Mixergy provides details on its iHP X heat pump cylinder and explains how to install it.
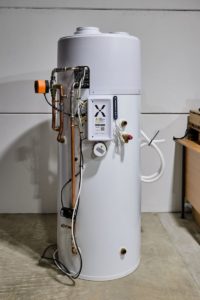
The Mixergy iHP X integrated heat pump cylinder has been designed so that the heat pump and cylinder are separate – different to other integrated heat pump cylinders on the market. This design makes it easier and lighter to transport, install and maintain and it comes pre-plumbed with simple connections designed for easy installation.
Only G3 unvented certification is required, and no F-GAS qualification is needed. Being modular, both the cylinder and the heat pump unit of the Mixergy iHP X are separate, everything is accessible, and both can be serviced and repaired.
It’s better for the end user too, because rather than taking hours to heat a full cylinder of water, it uses Mixergy’s unique ‘top down’ Stratos technology. By only heating the hot water needed, useable hot water can be available in under 30 minutes when in ‘fast boost’ mode.
It is designed for customers who are looking to save energy and be more sustainable whilst ensuring fast delivery of hot water when it is needed. With machine learning, smart controls and the Mixergy app, the user can set schedules and integrate with smart tariffs, making it easy to use, convenient for the individual needs of each household and cost-effective to run.
Installation step-by-step
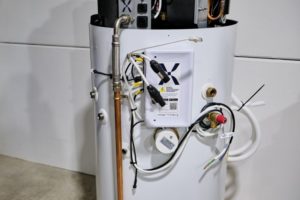
The position of the cylinder should suit the installation and all connections should be to the front for ease of access. Ensure there is at least 350mm of vertical clearance above the cylinder from the top of the ducting spigots.
Installation of the cylinder should be carried out as per the manufacturer’s instructions. The heat pump unit is then fitted as follows:
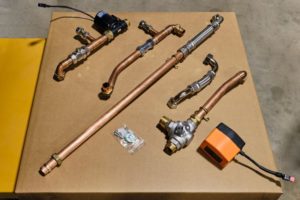
Pipework sub-assemblies, three-way ball valve motor, seals and screws are all provided for the job. Ducting for handling the exhaust and intake of air to the heat pump head unit is not included as the length will vary, depending on the complexity and positioning of the duct.
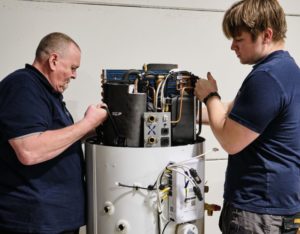
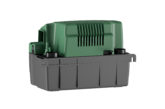
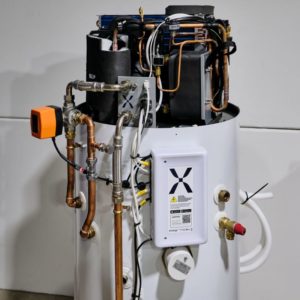
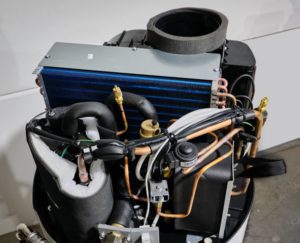
Step 1 Lifting the head unit is a two-person job. The head unit must be lifted by the straps and steadied by holding the fan housing. The head must be located by lining up the four securing bolts.
Step 2 Fit the securing bolts. Important: do not fully tighten the bolts until all the pipework has been fitted and tightened, to allow for adjustment of the head unit relative to the pipework.
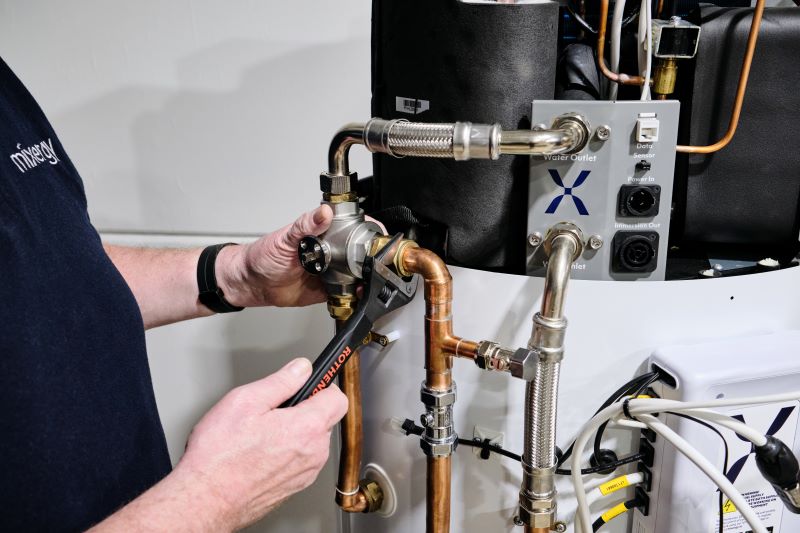
Step 3 The water inlet pipe is fitted between the cylinder and head unit.
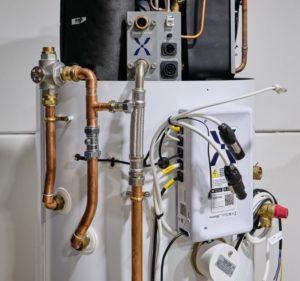
Step 4 The three-way ball valve and associated pipework is fitted to the cylinder and the three-way ball valve is fitted to the water outlet connection on the head unit.
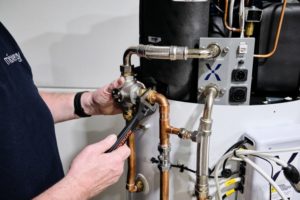
Step 5 Once all the connections are made, they can be fully tightened.
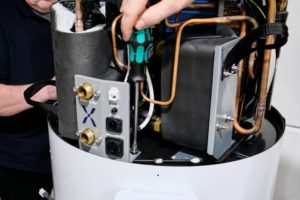
Step 6 The three-way ball valve motor is fitted, along with a total of four electrical connections between the controller and head unit. The head unit and immersion feeds are opposite genders to avoid incorrect assembly and are fitted by pushing the connectors into the sockets and twisting clockwise to lock into place. The sensor and data cables also need to be plugged in.
Step 7 Important. The auto air vent must be opened prior to filling the unit, then once the unit is full and all the air has been vented, the auto air vent must be closed.
Step 8 Once the unit has been commissioned, the top cover can be fitted and is secured with the four self-tapping screws that are supplied. Important: the screws must be fitted to make sure there is a good seal between the unit and the top cover. If the screws are not fitted and the cover is loose, it could impact the home’s heating efficiency.
The Mixergy iHP X is now ready for the ducting to be fitted. It uses 150mm ducting for the exhaust and intake of air to the heat pump head unit. Depending on the complexity of the duct, the maximum length will vary, so please refer to the installation manual for maximum combined duct lengths.
Please read the installation manual before installing the Mixergy iHP X.