Ken Vance, Training Manager at Salamander Pumps, advises on how to avoid five common pitfalls during the installation of shower pumps.
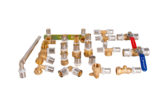
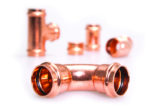
Solder before installation
Flux residue on the pump or the hose reacts with moisture particles in the air, having a corrosive effect on the pump. Gradually this can cause pin-prick holes and cracks in the product, resulting in water leaks.
It’s important not to attempt to protect the pump and its hoses during the sweating process simply by covering it with some form of material, as this can be ineffective due to the spitting of the flux. To ensure the flux avoids all contact with the pump and its hoses, the best method is to ensure all solder joints are completed and flux residues removed prior to the pump connection.
To do this, ensure all fittings are in the correct place and ready to be soldered, before removing the pump and hoses and placing them a distance away while the soldering is completed. Only after this phase is finished should the pump be re-introduced to the fitting and secured into place.
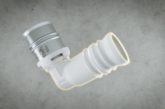
Don’t bend hoses more than 30 to 35°
Due to the noise-reducing, anti-vibration design of Salamander’s hoses, it’s important that the hoses are not bent more than 30 to 35° during installation, if at all. Bending, twisting, or placing excess strain on the hose can cause problems with the water flow, causing the pump to run dry, so it’s crucial that the hose is fitted as straight as is possible.
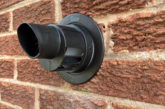
Fit an appropriate hot water connection
It’s vital to use the correct hot water connection during shower pump installations to reduce the amount of air entering the pump from the hot water cylinder. Having an aerated supply of water to a pump, showers and other outlets can cause a whole host of problems, including unnecessary, and perhaps sudden, fluctuations in temperature, increased noise levels, accelerated degrading of the pump’s internal workings and cavitation, which can lead to an eventual leak and a premature breakdown of the pump.
There are various flanges available for a shower pump installation, including a Surrey Flange (such as Salamander’s ‘S’ Flange), a Warix Flange, and a Non-Stop Essex Flange. It’s therefore crucial to check the fitting guide ahead of installation to ensure an appropriate flange is installed.
The Surrey and Warix flanges are both top entry flanges, meaning that they screw onto the hot draw off connection on the dome of a standard type hot water cylinder.
In comparison, the Non-Stop Essex flange is a side entry flange, which requires drilling into the side of the cylinder. This flange is best for when a pump needs to be situated above the hot water cylinder.
Some shower pumps don’t necessarily need a flange to be fitted. Provided the pump is installed at the base of the hot water cylinder, and the cold-water tank is stored in the loft, they can be teed from the first tee on the downward hot water leg.
Ensure the thermostat is below 65°
On directly heated cylinders, it’s essential that the water temperature is set to 65° to avoid any damage to the pump. In an indirectly heated cylinder, a blending valve must be installed to bring the water temperature down to 65°. It’s also important to ensure that the valve is big enough to allow the volume of water that you are going to use to pass through without too much restriction.
Cold water storage
It’s important to make sure that the house is storing enough cold water for the shower; 227 litres or 50 gallons is normally adequate for most shower applications. However, if you intend to run more than one bathroom, then you need to allow 227 litres for each bathroom and 136 litres for each shower room or en-suite.
Watch the common shower pump installation pitfalls video below…