PHPI hears how to use Bullfix Universal Heavy Duty Plasterboard Fixings.
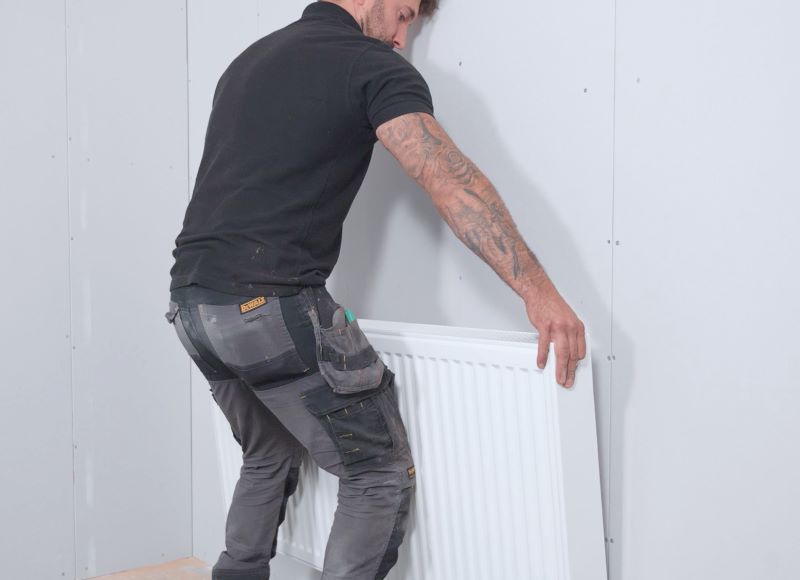
Fixing heavy items, like radiators, to plasterboard is often a challenge. Different plasterboard applications require different fixings – and it’s not always easy to tell if it’s dot and dab, stud wall or insulation-backed plasterboard. And out of the plethora of fixings available, which should be used?
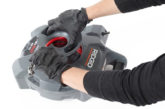
Mark Howe, a tradesman with over 35 years of experience in building and construction, and Matthew Statham, a chartered engineer with over 15 years of expertise in product development, sourcing and manufacturing in the Far East, have produced a solution that they believe addresses all these issues – the Bullfix Universal Heavy Duty Plasterboard Fixing.
Bullfix Universal fixings can be used with stud walls, dot and dab or insulated plasterboard, because only a 7mm cavity is required.
Here, the company provides its ‘step-by-step’ for fitting the Bullfix fittings:
Step-by-Step
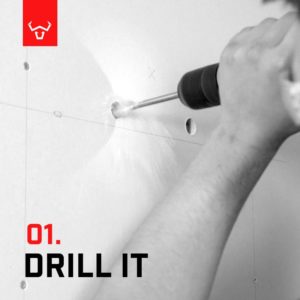
1. Use a stud finder to make sure you aren’t drilling into any pipes or cables, then measure and mark the positions of the holes you need on the wall. Drill the holes, using a 20mm flat bit. When drilling, let the drill do the work and be careful not to blow the back of the plasterboard.
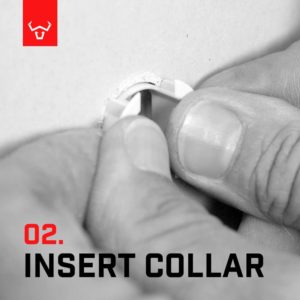 2. Insert the collar into the hole and gently tap it home. The collar helps to distribute the weight and makes the fixing very strong.
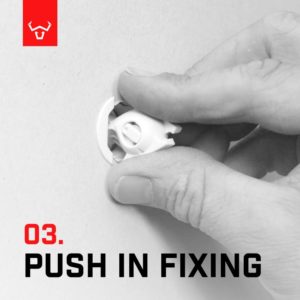 3. Insert the fixing. It looks like a fish, and you need to push it into the collar, tail first.
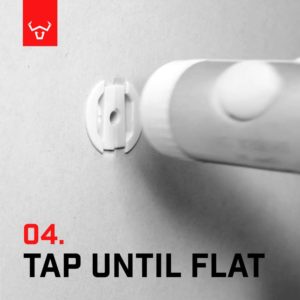 4. Tap until the fixing is flat. It is cleverly designed so that it is impossible to screw into the fixing unless the wings have properly deployed. There are two half-holes that only line up when the wings are properly opened, allowing a screw to be inserted. There are nice, wide pads on the ‘wings’ that open up behind the plasterboard, again spreading the load and making the fixing very strong.
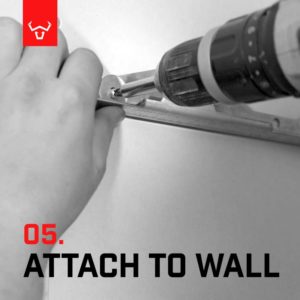 5. With the screwdriver on a medium torque setting, screw the object to the wall using the 5mm screw supplied. The screw supplied is deliberately short so that once it is screwed into the fixing it stops, because it’s not long enough to go any further. This protects the user from being over-enthusiastic and screwing against the solid wall behind the plasterboard, which could push the plasterboard off the wall. If a longer screw is needed because the item being fitted is thicker, then any 5mm or Number 10 screw can be used, taking care not to use one that is too long and could lift the plasterboard.
Bullfix Universal fixings have also been designed so they are easy to remove. Simply unscrew whatever is attached, then slip a small screwdriver into the bottom left or top right of the fixing and tease it out, then pinch to ‘close’ it into the original fish shape and it can be easily removed. Pull out the collar with a finger and the hole can be filled and made good.
Bulllfix Universal is designed to take up to 116 kg of weight and has been tested by FIRA for use with kitchen wall cabinets. However, the team has also developed Bullfix Extra which can take heavy objects of up to 133kg. It works in exactly the same way as the Universal fixing, but can only be used on plasterboard stud walls, as it needs a 20mm cavity.