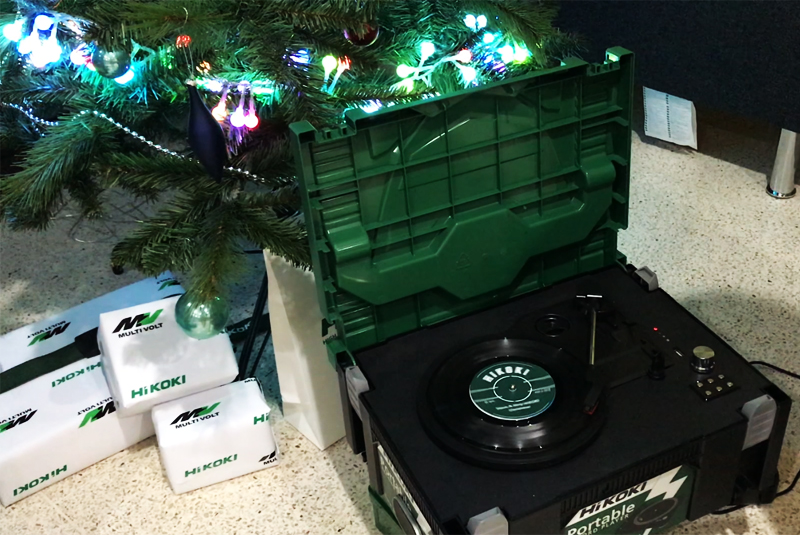
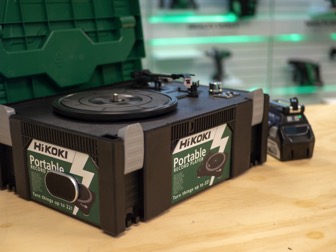
In the first of a new series of HiKOKI Hacks, Nick Chan, Marketing Manager of HiKOKI Power Tools, shows you how to make a portable stackable record player for all your on site music needs!
What sounds better, vinyl or digital? It’s an argument that divides generations. What sounds better, the crispness of digital or the character and crackle of vinyl? With this hack you can bring that argument onto site and show the apprentices what real music sounds like!

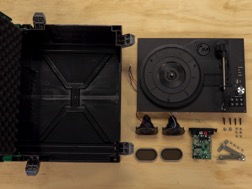
For this stackable turntable, you’ll need:
*A cheap portable record player from a popular market website
*Size 2 stackable case
*Combi drill
*Jigsaw
*Cordless die grinder
Step 1
The first thing that needs to be done is to open up the record player and carefully remove all of the electronics. I advise taking a picture before you start disconnecting cables, just so you have a reference when it comes to joining them back up. Alternatively, label each one. You’ll also need to clear out your own stackable case, remove any inserts and chisel off the years of masonry dust that has settled and hardened!

Step 2
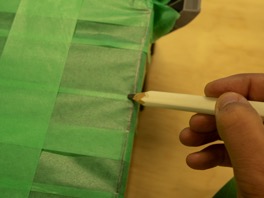
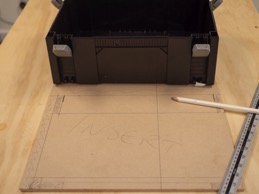
The demolition is over, it is now time to build. You’ll need to measure the opening in your stackable case or alternatively create a template. I used painter’s tape stretched over the opening and then used a pencil over the edges, like a brass rubbing. We can then transfer this onto a piece of leftover sheet material. I used some 6mm MDF (anything thicker you’d need to cut recesses with a router). I did the same for the openings for the speakers and inputs at the back.
Step 3
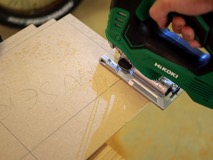
Time to cut out these carefully created templates. For the deck I used a jigsaw to cut these out, nothing too strenuous here. For the openings for the speakers, I used a cordless die grinder. Firstly, I used a cutting disk to cut the straight lines and get rid of most the material, then switched to various sizes of sanding bands to smooth out the edges and tidy up the cuts. NOTE: when selecting the speaker position, make sure you check the cables can then reach the PCB still, otherwise you’ll have to extend the wires! Once you’ve made all your cuts check they all fit and you can begin to make the spacers. I just used some plywood off cuts, but these can be glued directly into the stackable case. This will give something for the components and deck to sit on.
Step 4
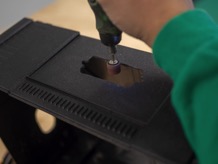
Now we can cut the deck for the record player to sit on. You’ll need to remove the components from the existing deck (remember to take a picture again for later) and set them aside. Using the original deck, position it on the new deck you’ve just cut to size and mark out your cut lines. For where the holes need to be drilled, I’d advise fixing the original deck down with some double-sided tape and drilling directly through. This way you can ensure correct sizing and placement. Then cut out the large area for the record player to sit in and slots for the USB (if your record player comes with this option).

Step 5
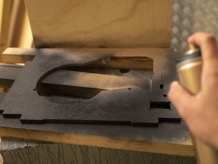
Now you can put a finish on the new deck. You can finish things however you want; paint, spray paint, laminate or even velvet. Once the paint has dried or the glue has set, you can start re-assembling the deck components. Refer back to the picture you took earlier to make sure cables are placed in the right way and things are securely fixed in place.
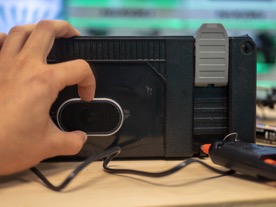
Step 6
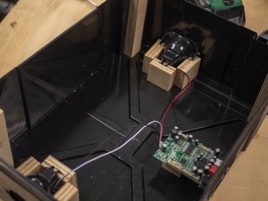
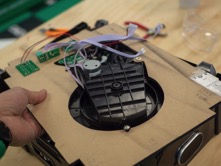
Glue the spacers and mounts that you have made into the stackable case and fit the speakers and PCB, locking them down with the original screws. Make a note where these spacers are so you know where to put the screws to fix down the top deck. Now open the picture from step 1 and reconnect the deck to the PCB. Place the deck onto the spacers and you are almost finished. Drill some pilot holes and screw the deck to the spacers below.
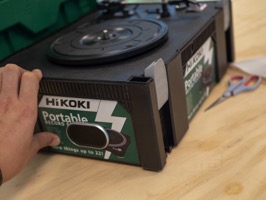
Step 7
Home straight! I made some stickers to dress my stackable case here. I took some measurements of the original stickers, created my design and printed them on some label paper. I stuck these down before using hot glue to attach the speaker grills, but if you aren’t creating stickers, go ahead and just put the grills on. And that’s it.

Pro tip
For my record player, I purchased a 5V USB cable. This works perfectly with the HiKOKI USB adapter for the 18v batteries. Plug this into the DC port in the back and you are ready to go. If you can find a plug, you could use the one that came with your record player… but where’s the fun in that?
Check out the turntable in action: