Low water pressure can be caused by many factors, depending on the type of property. For instance, in a direct mains-fed system, such as combination boilers, the incoming supply determines the pressure and flow in the system. So, if the supply is low, it is likely that the homeowner will suffer with trickling taps and poor performing showers.
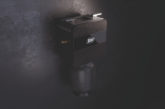
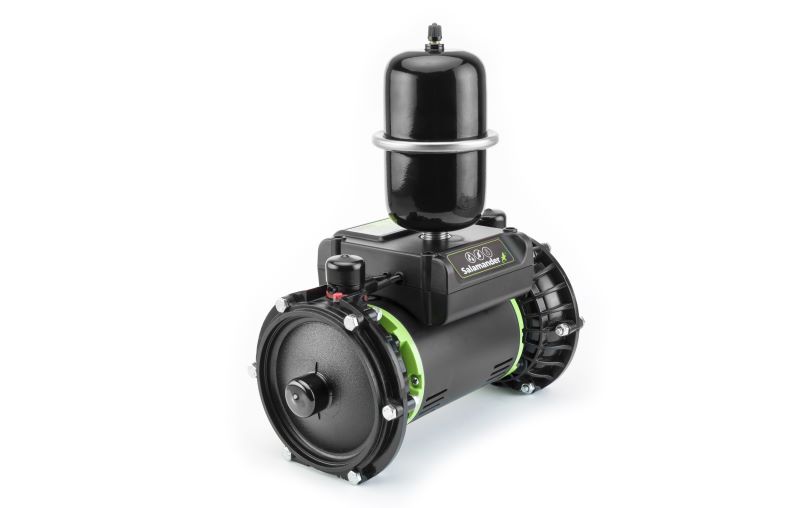
For installers looking to boost water pressure in homes with a vented system, the Salamander Pumps Right Pump range is capable of delivering the necessary water performance to meet demand. By providing greater flow rates to whole house applications, Right Pumps will quietly boost water flow and pressure for up to eight outlets on multiple floors. Here, Mike Oxley, Technical Training Manager at Salamander Pumps, shares his advice on how to install a Right Pump.
Location
First, choosing where to install the pump. The best location for the pump is at the base of the cylinder. Where it is not physically possible to locate the pump next to the cylinder, the pump must be located no more than five metres away from the hot water cylinder. All pumps in the range must be fed in 22mm except for the RP50PT/TU pumps, which can have a maximum of 2metres of 15mm pipe to supply the pump.
The pump should be placed in a position where there is an adequate air flow around the pump to cool the motor and away from any other appliances that generate heat. It should be installed in an area allowing 100mm additional clearance space all around the pump.
Don’t forget – loft mounted pumps must be protected from frost damage, especially important during the cold, winter months.
1. Hot and cold supplies to the pump
Never fit the pump directly to the cold-water mains, nor to communal risers (e.g. block of flats) or secondary circuits that are pumped. The pump must be exclusively fed by hot and cold water supplies.
Enough cold water must be available to meet the demand for water usage in the property. If the pump runs dry, the seals will dry up and leak. The pump will also be impacted over time by aeration and cavitation causing damage to the impellors, resulting in the pump’s failure. There should be 227 Litres (50 Gal.) of cold water storage per bathroom and 136 Litres (30 Gal.) per en-suite or shower. Alternatively, a Salamander Pumps ‘Water Starvation Kit’ can be used.
Cold water supplies to the pump must also be taken from the opposite side that the cold water mains water fills the tank.
Hot water supply to the pump must be via a Salamander Pumps approved anti-aeration flange and water temperature must not exceed 65°C. Where the pump is located above the hot water cylinder, it must be a minimum of 600mm below the cold water storage tank – with the hot supply taken via a Non-Stop Essex Flange in 22mm with an anti-gravity loop of 400mm.
Crucially, the anti-aeration flange helps minimise air intake. Because air bubbles gather at the top of the hot water cylinder, a flange draws water from deeper within the cylinder where the water is less aerated. Aeration can lead to cavitation and cause serious damage to the pump impellors.
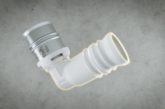
2. Anti-vibration couplers
Next up, you should fit the anti-vibration couplers (sometimes referred to as ‘flexi-hoses’).
Anti-vibration couplers are supplied with each pump. They make connecting the pump to the pipework simple and are designed to reduce the transmission of vibration from the pump to the pipework during operation. The hoses supplied with the pumps must be used.
Each single pump is supplied with two couplers; one angled and one straight. The angled coupler should be attached to the pump inlet (on the side) and the straight coupler should be attached to the pump outlet (on the top). Each twin pump is supplied with four couplers; two angled and two straight.
Importantly, hoses should always be kept straight to avoid starving the pump of water and to ensure a smooth operation.
The AV couplers MUST only be tightened to finger tight plus one quarter turn. Mechanical tools must never be used to tighten coupler nuts.
The pump must be mounted upright (shaft horizontal, not screwed down). Jointing compounds, Boss White and hemp must never be used. Solder fluxes must not come into contact with the pump or AV couplers. Solder flux is very aggressive, contact with plastic components will slowly erode the plastic and result in the pump leaking.
3. The electrics
The pump must be connected to the electrical supply using the mains cable with the attached plug. This plug must be connected to an accessible socket that has been installed in compliance with BS 7671 (I.E.T. Wiring Regulations).
You can wire into a switched fused spur but ensure the correct fuse size is used for the pump.
4. Commissioning the pump
Last but perhaps most importantly, it is time to commission the pump.
It is vital to discharge water through the pump into a container using natural flow before connecting the pump to outlet pipework in order to ensure the air has been discharged from pipework and pump chambers.
The best method is as followed:
- Flush inlet pipework and carefully fill pump with water by discharging water from the outlet flexible coupler into a container
- Fit pump inlet filters
It is CRITICAL to discharge water through the pump into a container using natural flow before connecting the pump to outlet pipework in order to ensure the air has been discharged from inlet pipework and pump chambers. This will not happen if the outlet pipework is connected to the pump. The best method is:
- Connect discharge pipework
- Check that all the pump isolating valves are open
- Fill system. Check for leaks
- DO NOT RUN PUMP DRY – to do so will cause irreparable damage to your pump and will invalidate your warranty
- Open shower mixer valve/system outlets to maximum hot and cold to check the natural flow (unpumped) flow of at least 2 litre per minute, individually on hot or cold – positive head systems
- Open hot water outlets fully for 5 to 6 seconds and then turn outlets off. Then open cold water outlets fully for 5 to 6 seconds and turn outlets off. If flow is poor and inconsistent repeat above steps until flow is steady
- Repeat 2-3 times
Consult the installation guide that comes with the pump throughout the install. This should be the go-to for any installation queries or concerns, ensuring the installation complies with the relevant bylaws.
For more information, please visit Salamander Pumps website to find out more about the Right Pumps range and any additional information ahead of your next install.