PHPI talks to Nu-Heat about how to install UFH in five simple steps.
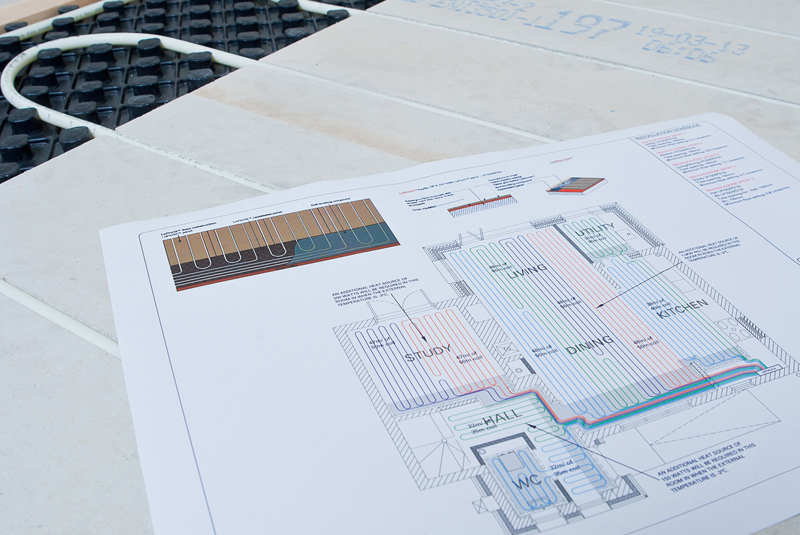
Do you know that you can install warm water underfloor heating (UFH) in an existing property from start-to-finish in just a couple of days? That it’s as simple as placing slim panels that hold the heating tube on top of the floor? Or that you are given tailored design drawings to follow, so you know exactly how to approach each job?
According to Nu-Heat, thanks to ever-improving, quality products and support, it’s hard to find a reason not to install UFH. With more and more installers giving it a go and singing its praises, it seems like there has never been a better time to join the underfloor movement.
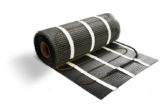
Thinking of getting started in UFH? Here’s Nu-Heat’s handy guide to installing LoPro10, a retrofit UFH system.
Installed in five simple steps
Installing LoPro10 is simple, even if you have never worked with UFH before. Aside from the fact that the product is placed on top of the floor, Nu-Heat also provides with a tailored system design and step-by-step manuals, so you know exactly where to place the manifold(s), panels and UFH tube. There are 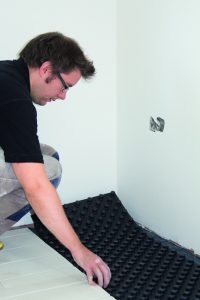 just five key steps to follow:
1 Prepare the floor
Begin by preparing the floor. A good base will ensure that the installation goes as smoothly as possible. To do this you need to clear the floor area and repair and level the floor, if required, using a self-levelling compound. In suspended timber floors you should also replace or screw down any uneven boards.
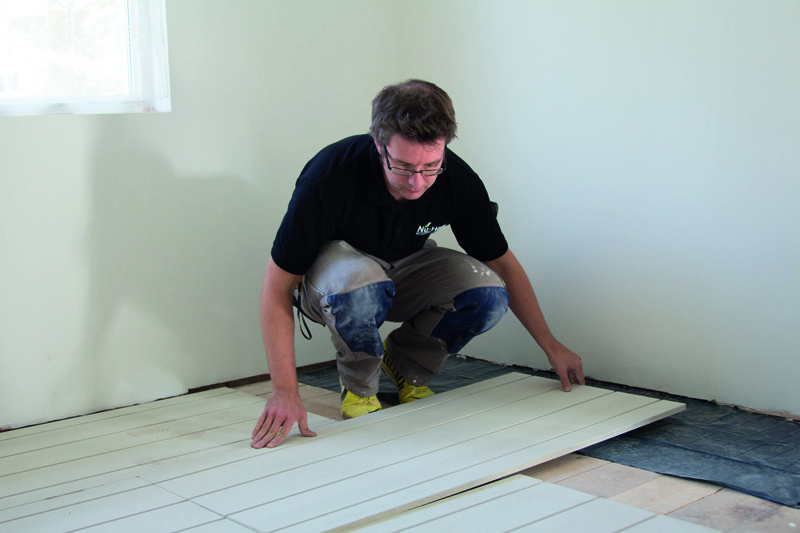
2 Lay the panels on top of the floor
Following the design drawings for the project, place the pre-routed panels on top of the floor. You will also fit a small amount of castellated panel around the edge of the rooms (this makes the tube runs back to the UFH manifold far easier).
3 Install the tube
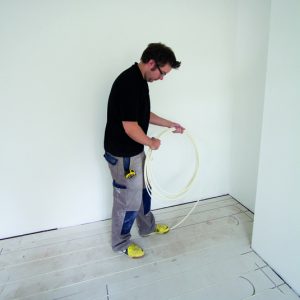 Now the panels are down, run the 10mm UFH tube from the manifold, which you will have mounted in a location as per the design drawings, to each designed zone and back, pressing it into the channels of the pre-routed panels. Tip: It is quicker to push the UFH tube into the grooves of the panels by foot.
4 Commission the system
With the tube runs completed and connected back to the manifold, it’s time to fill and pressure test the system, checking it is watertight and that everything works as 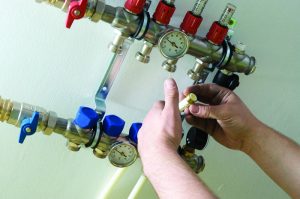 expected. The manual will talk you though this process.
5 Finishing touches
Finally, simply mix and pour a small amount of self-levelling compound to cover the castellated panels placed around the room edges and leave to dry for 24 hours. Your customer can then fit their chosen floor covering the very 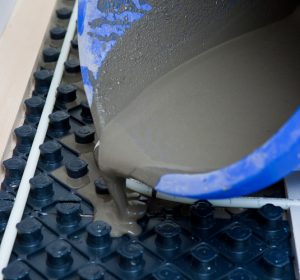 next day.
LoPro10 quick facts
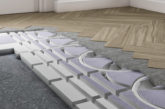
- LoPro10 is a retrofit underfloor heating system that you install directly on top of an existing floor
- The boards are pre-routed for quick and easy tube runs
- The system is super-slim, adding a total of 15mm to the floor height
- Your customer can fit floor coverings directly on top
- As a mostly dry install, work in other areas of the property can continue as normal
For more information on LoPro10, visit: www.nu-heat.co.uk