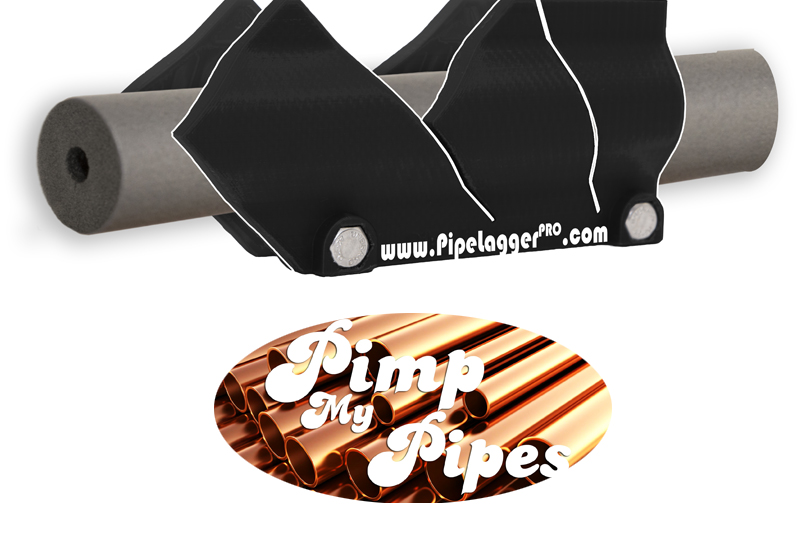
PHPI gets the opinions of two installers on PipeLagger Pro.
A few months ago, we took a look at the concept behind the PipeLagger Pro. In a nutshell, it was created to address the problem of installers struggling to complement the high standard of their work with pipe lagging –traditionally cutting pipe lagging over their knee and second guessing angles – which is potentially both inaccurate and unsafe.
PipeLagger Pro seeks to address these issues by removing the element guesswork – and the risk of a sub-standard finish. The product is compatible with 13, 19 and 25mm wall thickness polyethylene foam on 15, 22 and 28mm pipe diameters.
How it works
Note: PipeLagger Pro must be used in conjunction with the purposely designed toothless saw, which has to be sharpened before use.
1 – Insert each bolt head within each hexagonal recess located at the base of the clamp.
2 – Wind two locking nuts over each threaded bolt (hand tight) until it reaches inside face of clamp. Slide the other clamp over threaded bolts and wind final locking nut over each threaded bolt (refer to the adjustment guide for dimensions prior to securing any locking nuts in place).
3 – Adjust clamps and locking nuts accordingly as per guide, ensuring the gaps at both ends are dimensionally equal.
4 – Load desired lagging (slight adjustment on locking nuts may be necessary due to lagging manufacturer tolerances varying slightly). Do not overtighten clamps as this will distort the natural shape of the lagging and prevent seamless joints. Always ensure the lagging slides within the curves without too much resistance.
5 – Using the purposely designed saw, maintain contact at all times along the faces of each slot of V cut-outs.
6 – Measure and mark the centre line of the next cut, ensuring the orientation of the lagging is correct prior to the next cut.
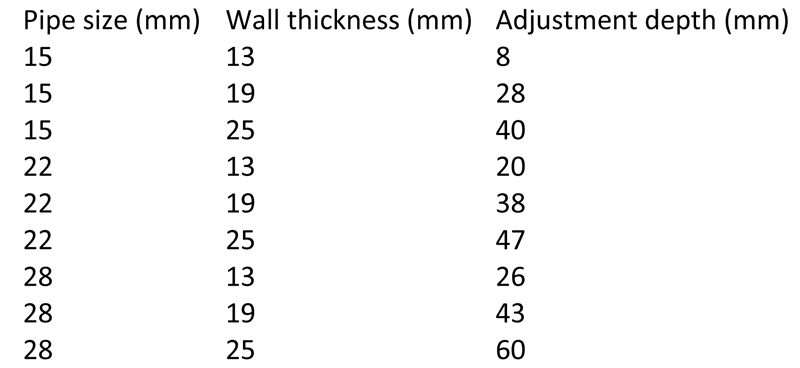
Adjustment guide
What the installers say
Ryan Mills, GD Mills Plumbing & Heating

“I’ve been using the PipeLagger Pro for just over a couple of months now. It’s not come into use all too often – but the times that I’ve used it, it has really improved the look of the job. Lagging pipes wasn’t always my strongest point and I’d say what I was doing previously wasn’t as efficient as it could have been.
“Joints are now much tighter and simpler for those Ts and 45° bends too. I firmly believe that, after plenty of practice, it will become a task I’ll manage with my eyes closed and it’ll reduce the amount I’ve previously wasted before seeing the light.”
Peter Booth, GV Booth

“I first came across PipeLagger Pro at a trade show. I was given a demo of it, and straight away I was sold on it. People need educating about things like heat loss, even on a basic combi swap, and pipe lagging should be part and parcel of the job. With PipeLagger Pro, it almost looks like you’ve bought the bends and the Ts because they’re so precise, and you can make whatever you want with this one tool. And it’s not expensive either. I believe that doing a good job should include everything – the boiler, the pipework and the lagging. Pipe lagging shouldn’t be an afterthought.”