Roger Bisby finds fitting the Stelrad Planar to be plain sailing.
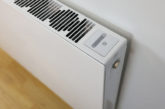
If you haven’t looked at a Stelrad catalogue lately, you really should – the company has what must surely be the largest selection of radiator styles for the trade. We’re used to being charged a premium for anything with a ‘designer’ label so it’s refreshing to see Stelrad is keeping it real with its trade prices. My customer wanted understated clean lines and no visible dust traps, and for this reason the Planar is a favourite among architects looking for modern functionality with no frills. It looks a lot more expensive than it is.
The first thing I noticed was the packaging is excellent on Stelrad’s designer range. Unless they are being handled by idiots, you can be confident the polystyrene panels will keep them dent and scratch free. Even the rear brackets are well protected.
 We all know that radiator is a bit of a misnomer but I still come across radiators that have been fitted too close to the floor to allow sufficient air to enter at the bottom. For me, 150mm is standard and I will only drop below that in special circumstances. My approach is to keep them as close to the wall as possible. Having that nice close fit on the top grill also means there’s less chance of things being dropped behind them. Like most plumbers, I have found countless items of underwear down the back of radiators… some of it too good to be used as mopping up rags. If ever my van is searched on a routine stop, that’ll be my defence.
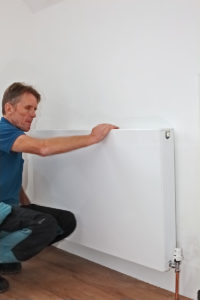
Having worked with many different plumbers over the years, I am struck by how many tricks they have to make fitting rads easier. One plumber I know has a couple of lengths of half inch barrel in his van and he screws one into each of the top tappings and uses them as handles. It is so much easier than trying to grab the bottom edges of the rads. If the radiator is very long, he’ll lift and lower one end onto the bracket and then lift the other end in place. The trick is to put only the top in on each bracket, then you can simply lift them and push in the bottom with your knee. Personally I place a couple of timber off cuts on the floor and lift the radiator onto these chocks. When the radiator’s secure on the brackets, I kick the chocks away.
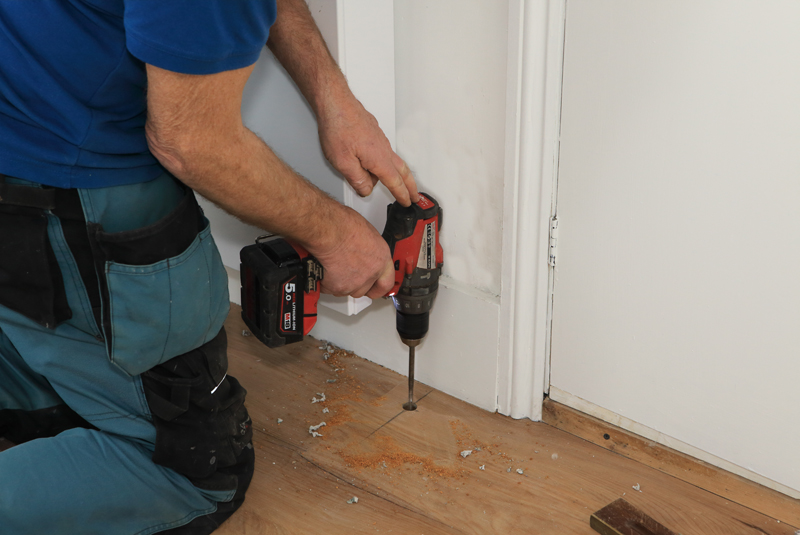
When it comes to fixing the brackets, the worst case scenario is a stud wall. Some plumbers cut a slot in the wall and lay in a timber batten to span some studs while others rely on plasterboard fixings. I’ve been very impressed by the strength of some fixings but I have never relied on them on their own to hang a rad. The makers of plasterboard fixings load dead weights onto them in laboratories but what they should do is to get a 10-year old kid to swing on them. The rear bracket tabs are very accurately welded on Stelrad’s, so you shouldn’t need the slots on the brackets for adjustment.
Another thing I’m not very keen on is wrapping PTFE tape around radiator tails. I have seen so many leak over the years, due to the tape running up the chrome thread so there is none left inside the tapping or simply because they don’t put enough on the thread. I have been scratching (breaking) the threads on chrome fittings all my working life but I’ve abandoned PTFE tape in favour of pipe sealing thread or twine. There’s no need to run the cord into the thread – if it overlaps in a figure of eight, so much the better. You will notice that the thread tightens rather than simply remaining loose and you can back it off around 45° without causing a leak. Some plumbers have told me they find the thread too expensive but a little goes a long way and the fact that I’ve never had a leak means it’s worth every penny.
If you are worried about hairy joints, only cover the first half of the thread with the cord. It will run up the thread slightly but won’t show at the top and still won’t leak.